
If you're importing through the in-editor Asset Store window, make sure that your Unity Editor is properly signed in to your Asset Store account. Otherwise, it'll import the previously downloaded version of Odin.

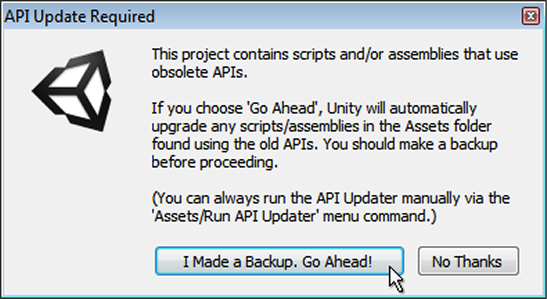
when the API Updater pops up.

You're now all set to start using Odin Inspector!
When Odin is done importing, you'll see the Getting Started popup. Here you will have everything you need to quickly get started using Odin - all inside Unity!
Note that if you've previously set custom assembly import settings for our DLL files, you will have to do this again. In most cases, Odin's import settings are automated.

Building custom inspectors is one of the easiest ways to improve your workflow in Unity, and Odin makes it simple. With the Visual Designer, you can customize your inspectors using intuitive drag-and-drop editing and see the results instantly, all without writing a single line of code.
This lets you quickly create clear, purpose-built tools tailored to your project’s needs. Whether you’re organizing fields, simplifying complex components, or building tools for your team, having the ability to easily create custom inspectors helps you work faster, reduce mistakes, and make your editor tools accessible to designers and non-programmers alike.
Get started with the Visual Designer
If you already downloaded Odin Inspector from the Odin Inspector Website, or if you’re on the Free Trial, you can skip this step, as Odin Validator will already be installed.
If you’ve purchased Odin Inspector and Serializer from the Unity Asset Store, you’ll need to import Odin Validator separately.
Follow the same steps as you did when importing Odin Inspector and Serializer.

Important note: The Odin Validator version you import must match the Odin Inspector version.

Go to the Getting Started Window - This window is always available from:
The Odin Validator window should be green - if it is greyed out, that means the Odin Validator has not been installed yet, in which case you should follow step 1.

Click the Setup Wizard button.

To configure Odin Validator, follow the setup wizard instructions as well as the instructions in the introductory error message. This configuration process ensures that Odin Validator is appropriately set up to check for errors and issues in your project .

To start the configuration process - Press Start.
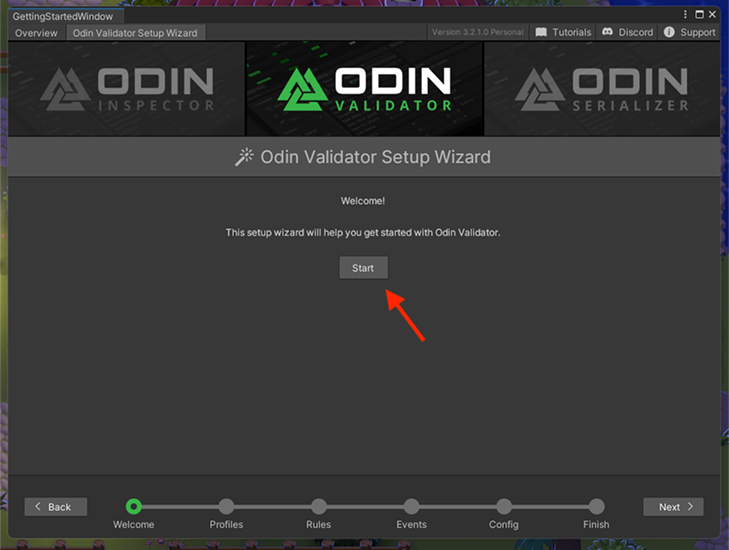
Please follow the Setup Wizard instructions carefully - it is fine to leave everything as default, but do take some time to read what the Wizard has to say, to ensure a correct and smooth setup.

You’re now all set to start Validating your projects!
You can learn more about the Odin Validator Interface right here.
or
Go through our free and quick course on how to get the most out of the Validator.