Static variables, static classes and static functions when used correctly can greatly smooth out your development.
Use cases such as tracking game state, turn number or “helper” classes with frequently used functions are common and can be very helpful.
Static variables don’t show up in the inspector no matter whether they are public or private. So debugging the value of a static variable is often inconvenient and can require some “less than elegant code.”
With Odin Inspector, you can add the [ShowInInspector] attribute to a static field in your code To see the value in the inspector.


Or you can add a [button] attribute to a static function.
But you may not want to do that to all your static fields and functions, let alone in third party code, just to debug or monitor the values.
Or in other cases there may be static classes that you can’t see in the inspector such as classes that don’t inherit from MonoBehaviour.
This is where Odin Static Inspector comes in!
It’s built into Odin Inspector and easy to use.
The static inspector is great for debugging. No more printing values to the console! No more hacking solutions together to read the value of a static variable.
Simply open the inspector, select the type and all the static members are visible!

Opening the Static Inspector
You can find the static inspector under the Tools menu then Odin Inspector and finally Static Inspector.
With the static inspector window open. You’ll find two search bars. The top search bar will search for a given type that you want to inspect. The second search bar will appear after you select the type and will allow you to search for static members within that type.
As an editor window the SI can easily be docked for quick reference throughout the development of your project. Meaning you can see the values no matter what object is selected or what shown in the Unity inspector.
What else can you do with the Static Inspector?
At its simplest the Static Inspector allows a developer to inspect static members of a class - even if the class itself is static!
But, that’s not it’s only trick.
it also allows developers to edit the values of static variables as well as invoke static methods with the press of a button.
Function results

Parameters of static functions can be set with a simple input slot in the static inspector.
And as of version 2.1.7, the “result” or the return value of a static function is displayed directly in the static inspector. This can further speed up the development of helper classes or extension methods.
Pretty clever and pretty helpful.
Other features
The Static Inspector also offers some filtering options to help you find exactly what you’re looking for.
Such as filtering the member types that show up in a search.

And toggling whether private and or public members are shown in the results.

Player Stats example
With the goal of keeping inspectors easy to read and easy to use, it is possible to add a button to a class inspector that will open that class in the static inspector. This can be done with the command
StaticInspectorWindow.InspectType(typeof(SomeType))
This is particularly helpful for classes that need to be inspected or debugged regularly and you don’t need or want to clutter the inspector with static values or lots of buttons. You can also set the modifier and member type flags in the function call to get to your search results even quicker.
public class PlayerStats : MonoBehaviour
{
    private static float playerSpeed = 1.5f;
    private static string playerName = "Hank";

    public static void SetPlayerSpeed(float speed)
    {
        playerSpeed = speed;
    }

    public static string GetPlayerName()
    {
        return playerName;
    }

    [Button("Inspect This Class"), GUIColor(0.4f, 0.8f, 1f)]
    [PropertyOrder(-10)]
    private void InspectThisClass()
    {
        Sirenix.OdinInspector.Editor.StaticInspectorWindow.InspectType(typeof(PlayerStats));
    }
}
Game State example

A simple example of using the Static Inspector might be the use of a static enum used for tracking and controlling the game state.
The static inspector can make debugging the value of that enum.
For this example you may have a static function that when called changes the state of the game. The Static Inspector provides an easy and convenient way to test that functionality.
public class ModeManager : MonoBehaviour
{
    public static GameState gameState;

    public delegate void GameStateChanged(GameState gameState);
    public static event GameStateChanged gameStateChanged;

    [Button("Change State")]
    public static void ChangeOfState(GameState state )
    {
        Debug.Log("Changing Game State To " + state);

        ModeManager.gameState = state;

        gameStateChanged?.Invoke(state);
    }

    [Button("Inspect This Class"), GUIColor(0.4f, 0.8f, 1f)]
    [PropertyOrder(-10)]
    private void InspectThisClass()
    {
        Sirenix.OdinInspector.Editor.StaticInspectorWindow.InspectType(typeof(ModeManager));
    }

    public enum GameState
    {
        startScene,
        explore,
        combat,
        paused
    }
}
Adjusting Values in Real Time
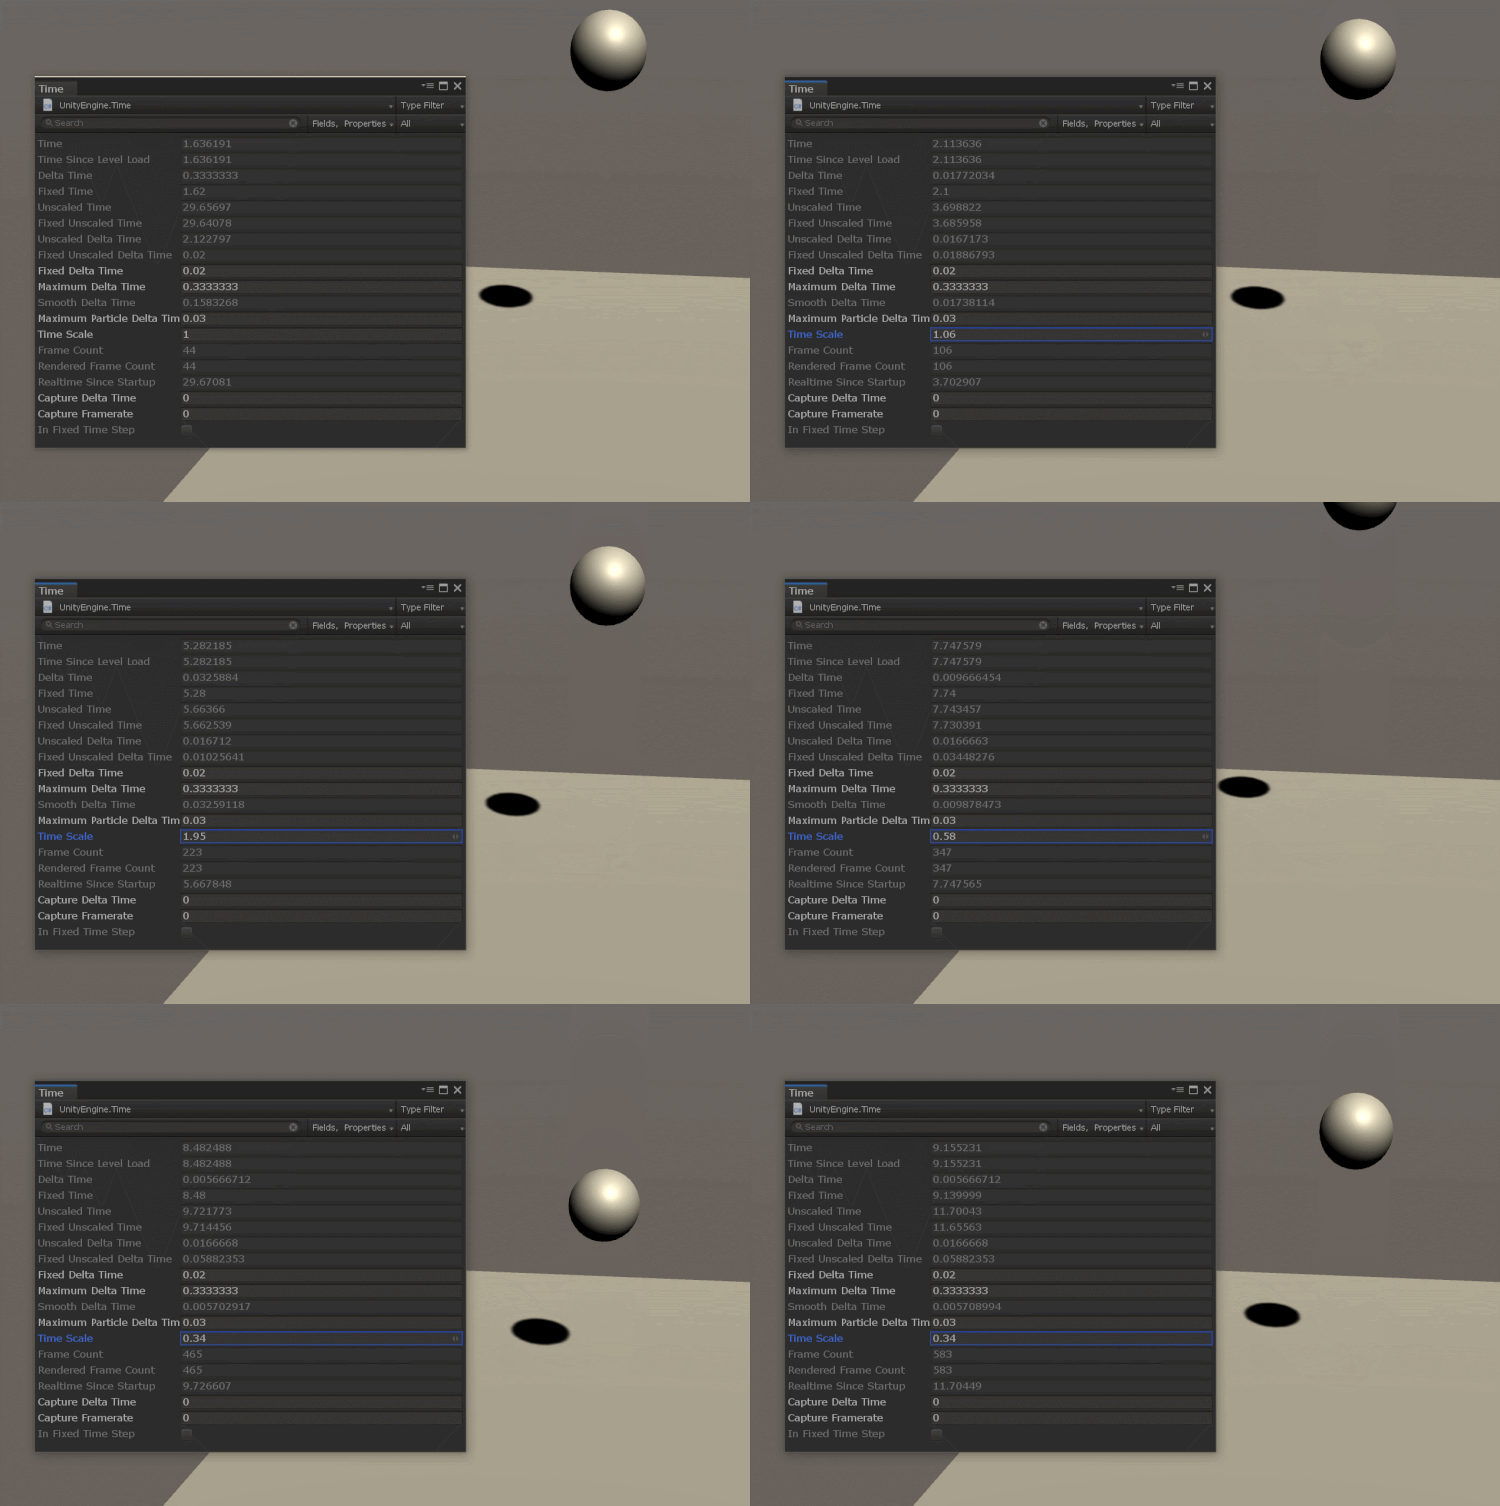
You can also access Unity built in types - not just your own custom types.
A fun example is to search for the type “Time”.
From there you can easily adjust the time scale. Simply slide the value back and forth until you find the value that’s perfect for the effect you’re trying to create.
There’s no need clutter your project by creating an additional custom script to adjust the time scale.

Note of caution

Now a note of caution.
There are many fields that the Static Inspector gives you access to that are great to play with and can ease your game development.
The Static Inspector also gives access to fields that if changed can have negative consequences.
If you go digging into Unity types and fields then before you change a value make sure that you have an understanding of what you’re changing and valid values for that field.
With that, we hope you can see and imagine the usefulness of the static inspector in the development of your game!
Visit our YouTube channel to see the video version of this tutorial here.
Until next time… Happy game designing.